Configuration of the Freebox (Thompson Speedtouch 716) is simple with the setup wizard.
Approximate setup time 5-10 mins
This
instruction is for configuring the unit as a WAN router with VoIP
capability. Ethernet port[4] will be reconfigured as a WAN port. This
is typically for users with broadband delivered over TV cable (eg. Virgin)
or by a wireless ISP (eg. Plusnet) . The configuration sets the
WAN port for dynamic IP assignment only
(ie. if you have a static IP this will not work - a static IP is an IP
provided by your ISP which you have to type in manually).
Before you begin:
- Print this page as you will not have Internet access during this procedure
- You will need a regular analogue phone for making calls (same as BT phone)
- Have your Freespeech extension and phone password
- Disconnect your existing broadband router/modem
- Disconnect any USB cabling connected to your broadband router (if any)
- If template wizards are not preloaded (see step 4) then install according to instructions (see appendix)
1) Connect up your Freebox.
Connect up the Freebox as shown, then power on.
NOTE: Don't plug any WAN cable in yet.
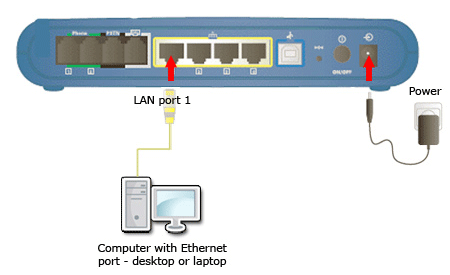
The LED lights on the front of the unit should be as follows
PWR - GREEN (indicates power is ON)
Ethernet 1 - GREEN (indicates PC is connected)
2) Connect to the Freebox administration page.
Using the Internet browser on your PC visit http://192.168.1.254/
( more detailed instructions )

3) Start Wizard
On the main menu go to Speedtouch > Configuration
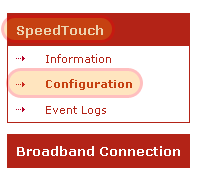
Click Setup to start the wizard.
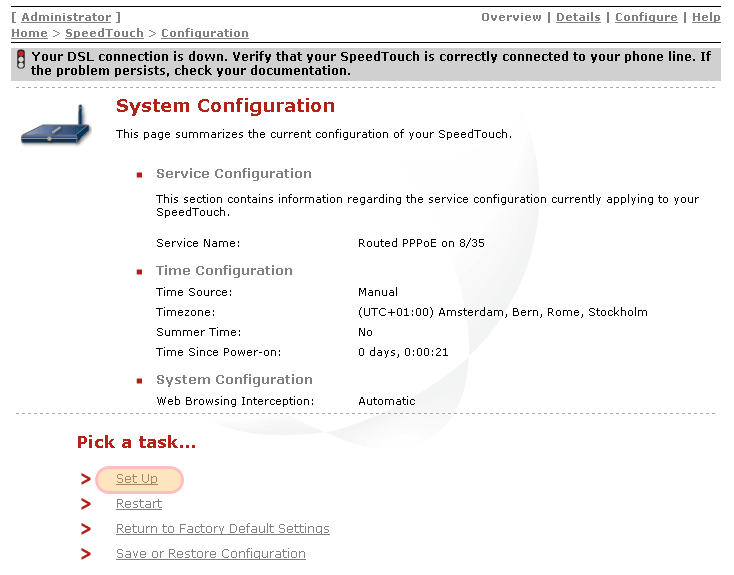
Click Next
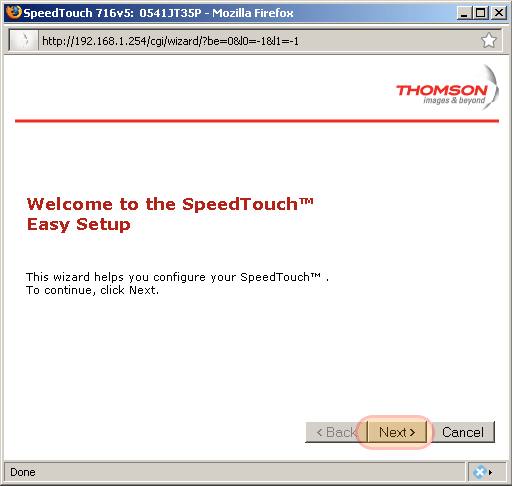
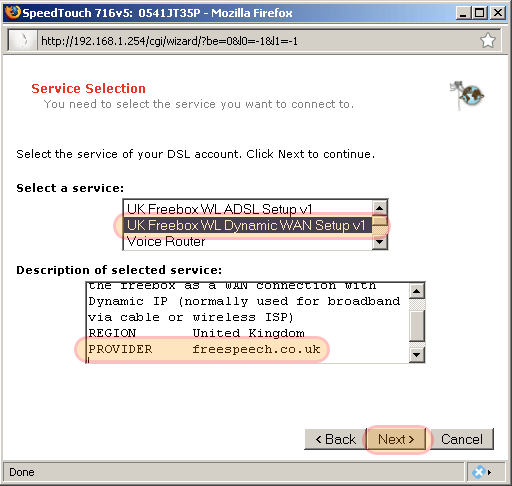
4) Select configuration
Select Freebox WAN Setup from the list and click Next. (if this option does not exist see appendix on how to load template files)
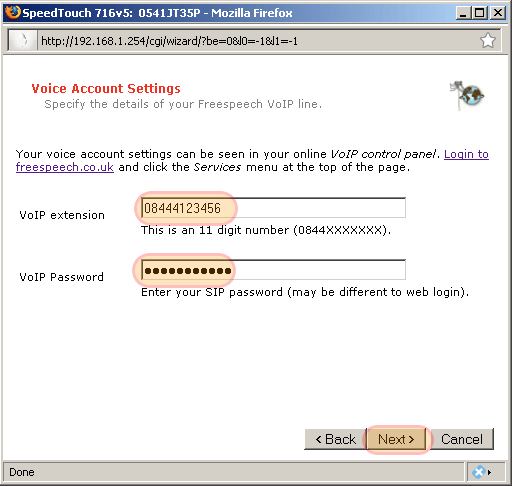
5) Configure Freespeech settingsThis will setup your freespeech phone line. Enter your freespeech number and password.
NOTES:
- You will find these by logging into your Freespeech account and checking your VoIP Control Panel (see explanation).
- The Password is your VoIP password NOT your Web login password (They will be the same by default but you should change them)
6) Configure Freebox Access
If
you wish, you can change the username and add a password to access the
administration pages of the unit. (Don't forget to write your new
password down).
Password fields can optionally be left blank if you prefer no password.
Click Next when done.

7) Configure Wireless Access (only for wireless version)
This will configure your Freebox so you can connect your computer to the Internet using Wi-Fi.
Choose the appropriate option and settings then click Next.
Recommended is On-Secure. Your Wireless Name (SSID) will be used for computers to scan and identify your Wi-Fi network.
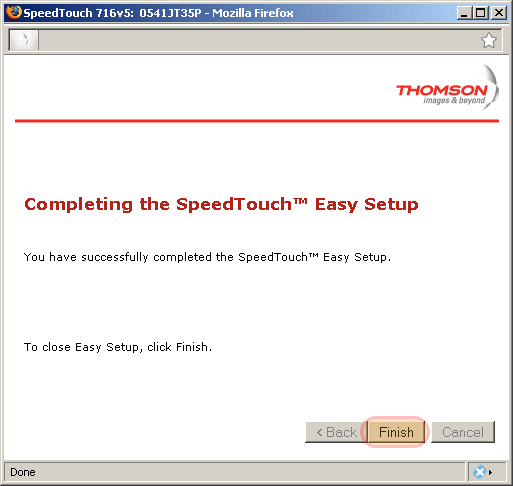
8) Finish Setup
Scroll through the screen to check settings then click Start and you unit configuration will begin.
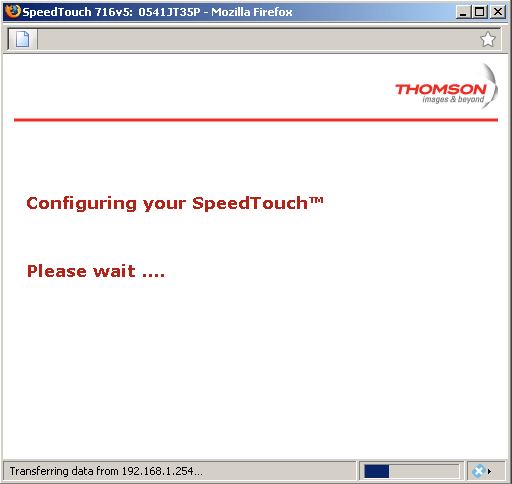
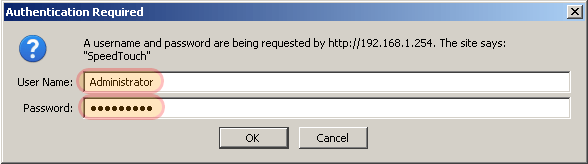
Your screen will show configuring, the unit will then restart with the new configuration
You may be asked for a username and password (if you set one).
When completed click Finish
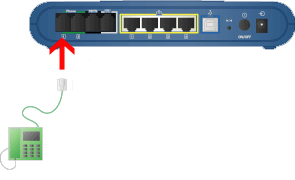
9) Connect the WAN cable
Now connect the WAN cable to Ethernet PORT 4 as shown below.
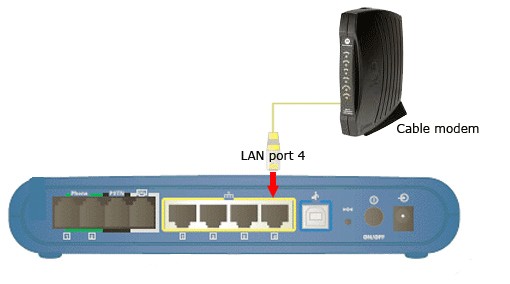
The LED light on Ethernet port 4 should light up.

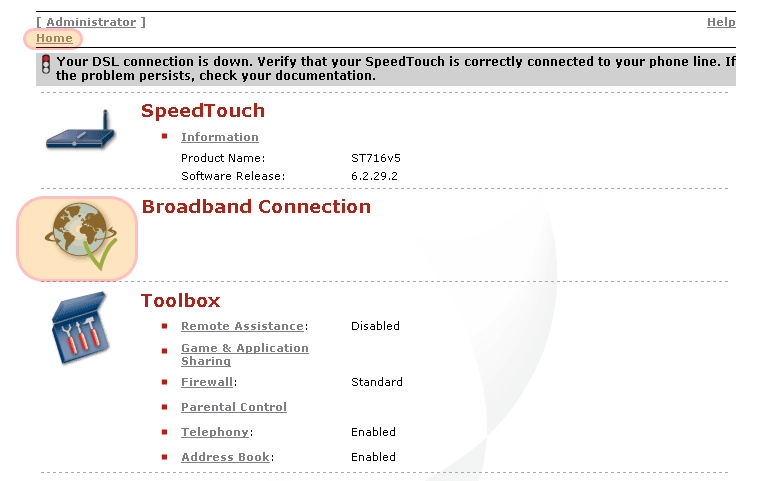
10) Check your Internet Connection
If everything went well your Internet connection should now be active.
You can verify this on the Home page of the unit.
NOTE: Do not check the DSL connection, click on the Home link as illustrated below. You will have a message saying DSL connection is down, this is OK (you are not using DSL).
If the Internet connection is not working, try powering the Freebox OFF/ON.
and try logging in to your account on freespeech @
https://www.freespeech.co.uk/secure/login.html
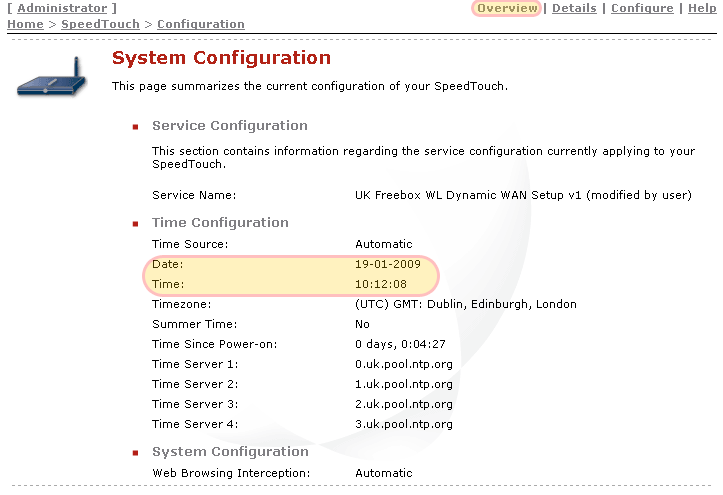
11) Set the Time
For call logs and system logs on the unit it's a good idea to set the correct system time.
This is easily done automatically (make sure Internet connection is active)
On the Speedtouch > Configuration page click Configure
Check the box Auto-configuration and Summer Time (if applicable) then click Apply.
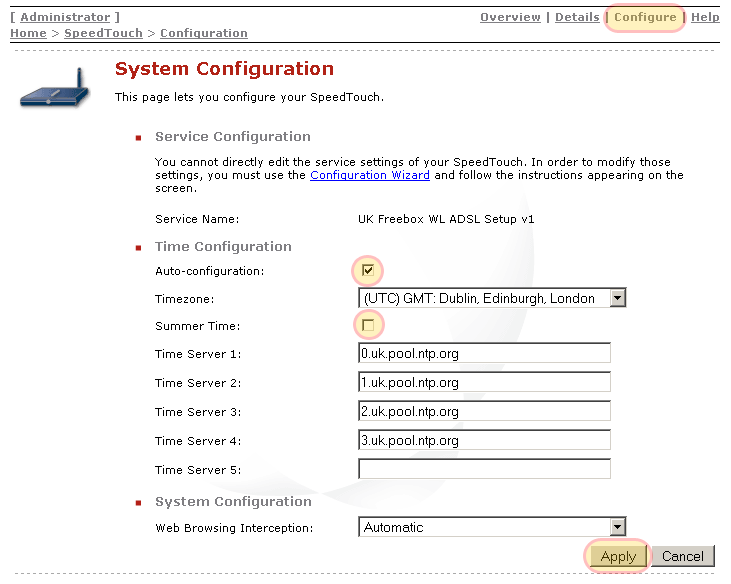
The time will be automatically updated. You can check this on the Overview page.
12) Checking Freespeech Phone Line
If your unit was correctly configured the VoIP Ready light should be lit up on your unit (Make sure your Internet connection is active). This means your Freespeech account is online and ready to make or receive calls.

Alternatively you can check Toolbox > Telephony section Details to see the unit is registered (online).

To make a call test plug a regular analogue phone (BT style) into phone port [1] on the unit, you may need a UK adaptor.
- Pick up the receiver and dial 1742 to try an echo test.
-
Try calling a land line or mobile number. When calling landlines you
will need to prefix with the area code (for example to dial a Glasgow
number you will need to dial 0141 before the number even if you are in Glasgow)
Appendix: Loading Wizard template files to your Freebox.
1) Download the appropriate wizard file to your PC
WAN wizard file for wireless unit (has antennae) - Download Here.
WAN wizard file for wired unit (no antennae)
- Download Here.
2) Connect your PC to the Freebox
See instructions
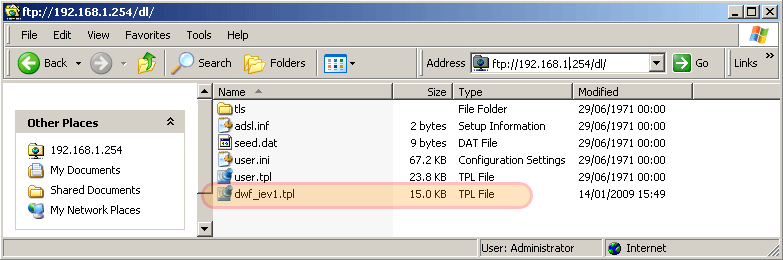
3) FTP the file you loaded to the Freebox
The
FTP (File Transfer Protocol) is used to transfer files to the unit.
Windows File Explorer (NOT Internet Explorer. TIP:open file explorer by clicking on your 'My Documents' folder) or a special FTP application can be used to
connect to the unit.
Note:The default username is Administrator and there is no password. The default ip address is 192.168.1.254.
Connect with File Explorer by entering ftp://Administrator@192.168.1.254/dl/ in the address bar

Then drag an drop the correct .tpl wizard file into the ftp folder.
Useful Guides
Manufacturers Install Guide for Freebox (Speedtouch 716) - Adobe Acrobat PDF file
Manufacturers User Guide for Freebox (Speedtouch 716) - Adobe Acrobat PDF file